
Week 8
Computer-controlled machining
Make something big.
We got one sheet of 15mm x 1220mm x 2440mm plywood to design something that we could cut in the shopbot.
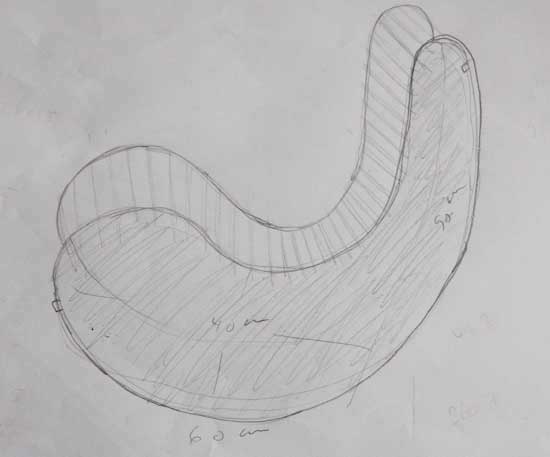
I wanted to design a lounge chair for the garden. At first I had designed a lounge chair that was so big that I would need three sheets of plywood so …. I scaled it down and changed it so it would fit on one sheet of plywood.
I started by drawing.
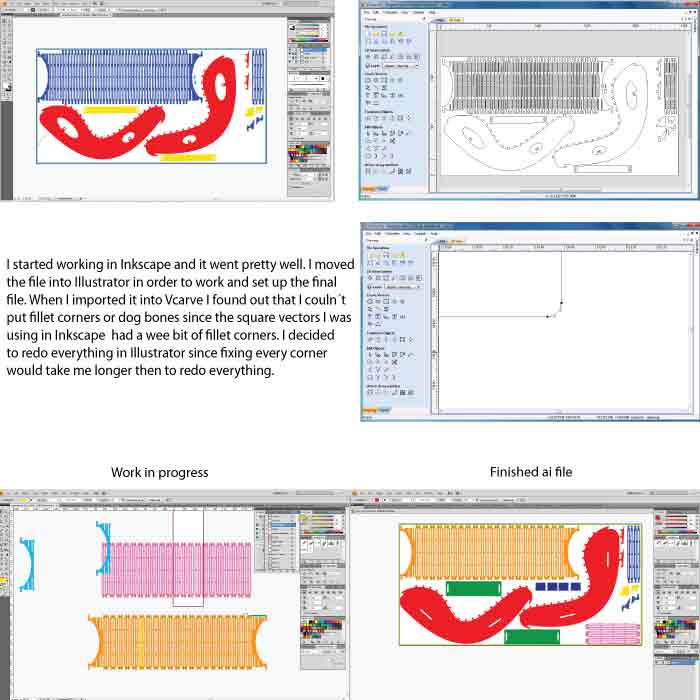
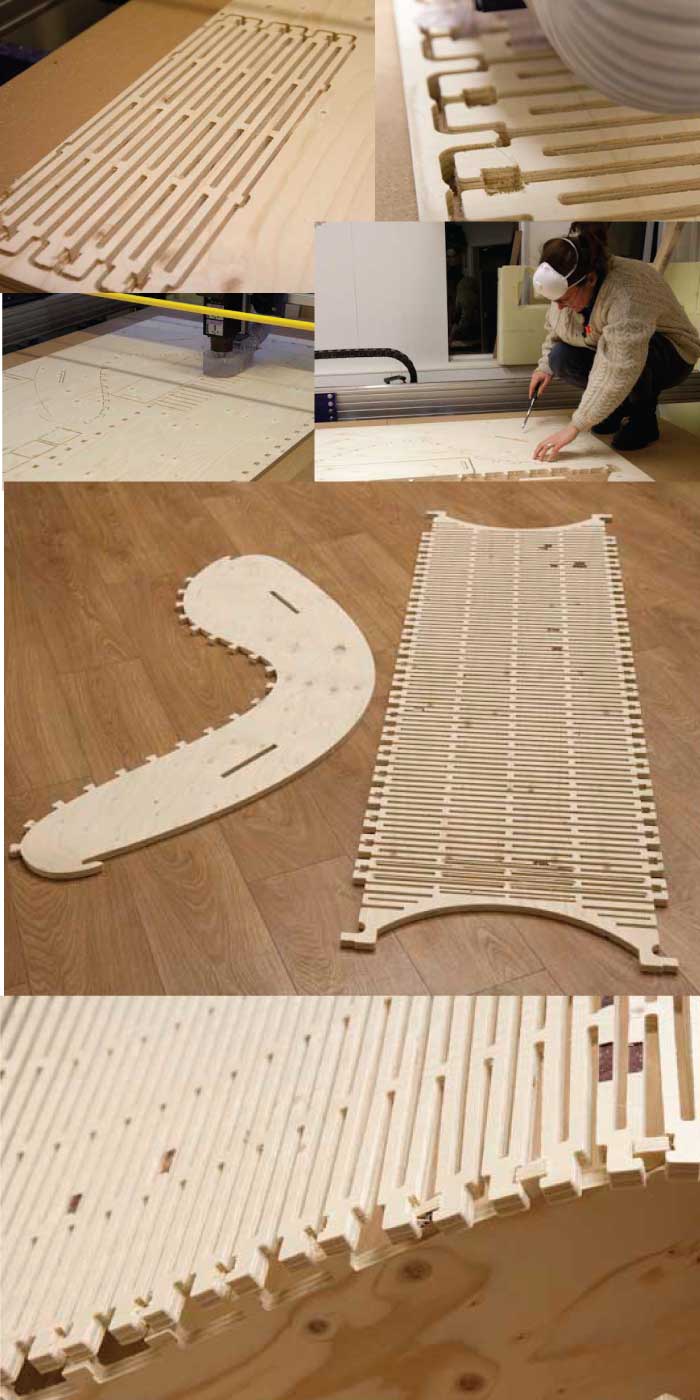
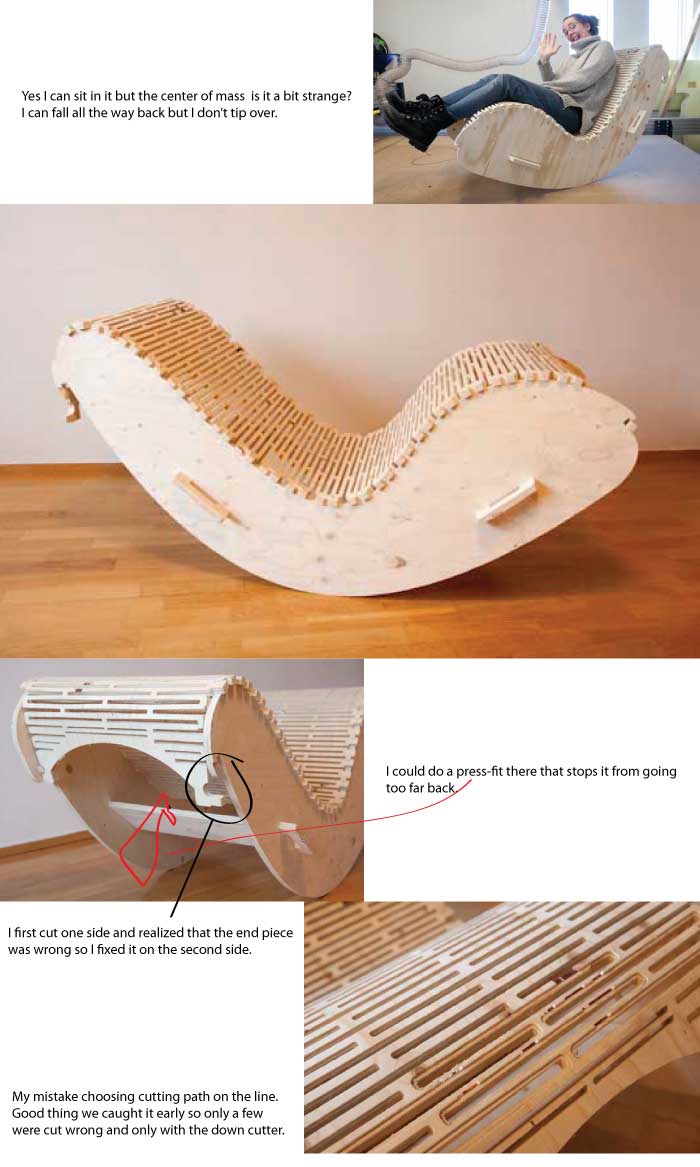
I learned so much working on this project. First I went the long way and did everything by measuring and using guides and with everything in one layer. I was so lucky that one of my fellow students Sigga Helga knows Illustrator very well and she showed me how to use layers and symbols so the work became so much easier. It was a lot easier to make changes this way. It´s funny how many times I had to make some changes all the way to the end of the whole process. I thought I had everything under control and that I had measured everything many times but somehow I forgot something. First I did a test which you can see in the right end of this last picture.
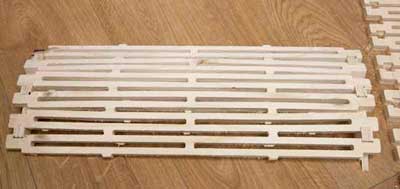
After cutting out the test I found out that the T´s and the holes for the T´s worked out great but the T´s were too close together so I fixed that.
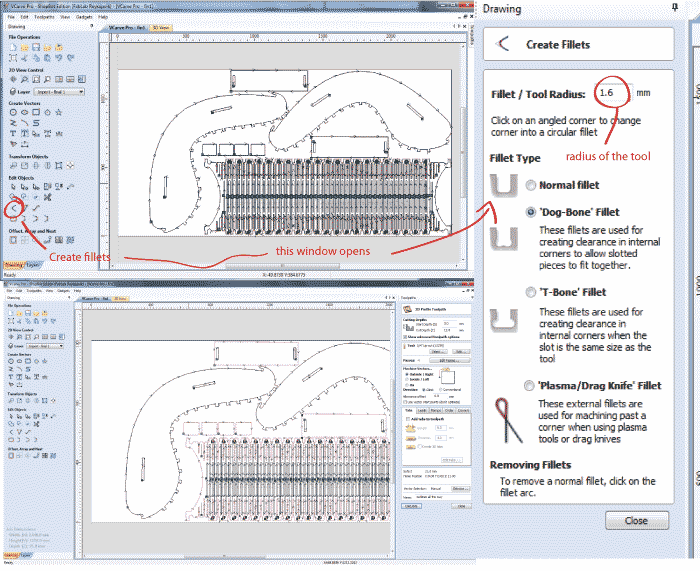
I imported my Illustrator file into VCarve the way you can see in the picture above. There I put in fillet corners and dog bones where I needed to.
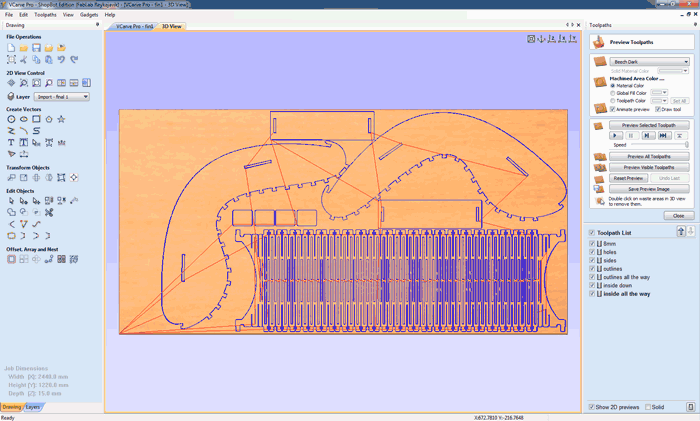
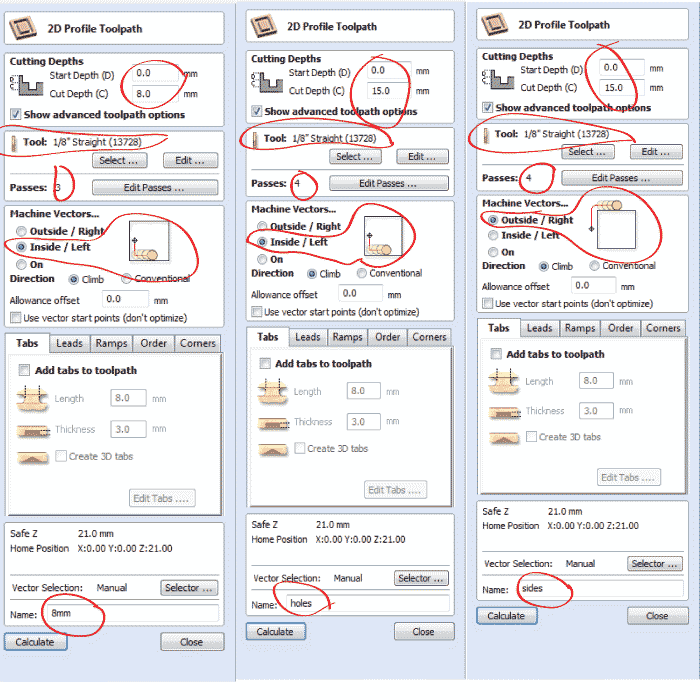
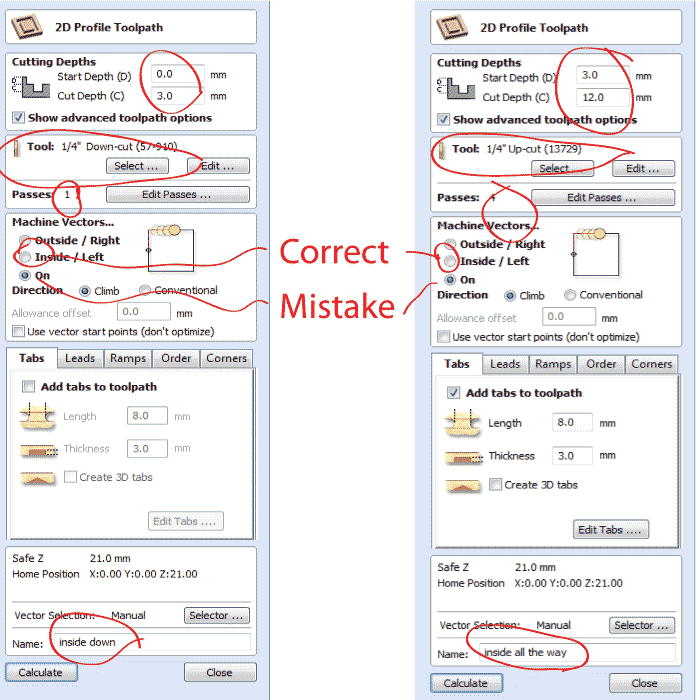
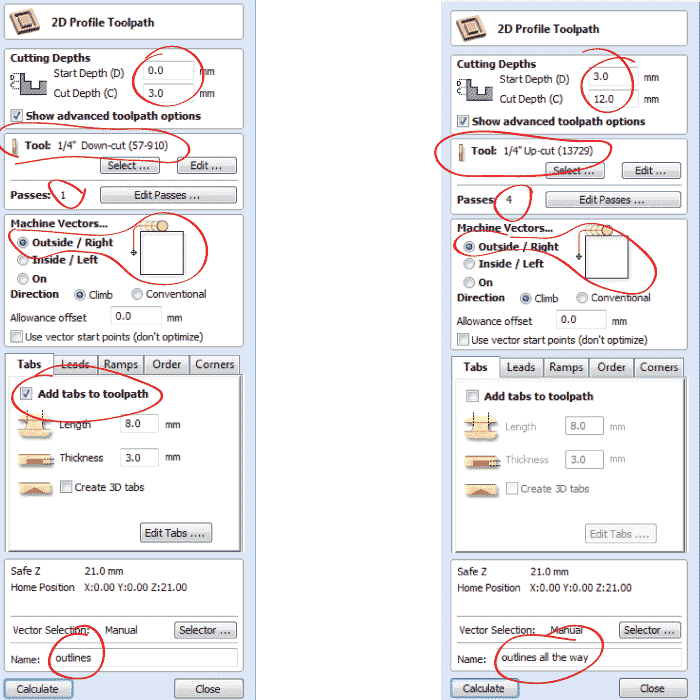
I go into toolpaths and click on show toolpaths tab and then I create my toolpaths.
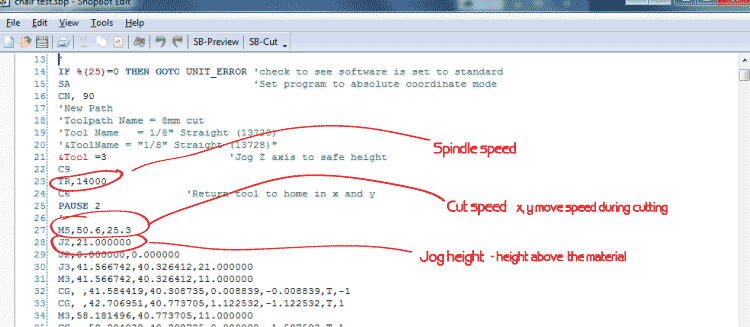
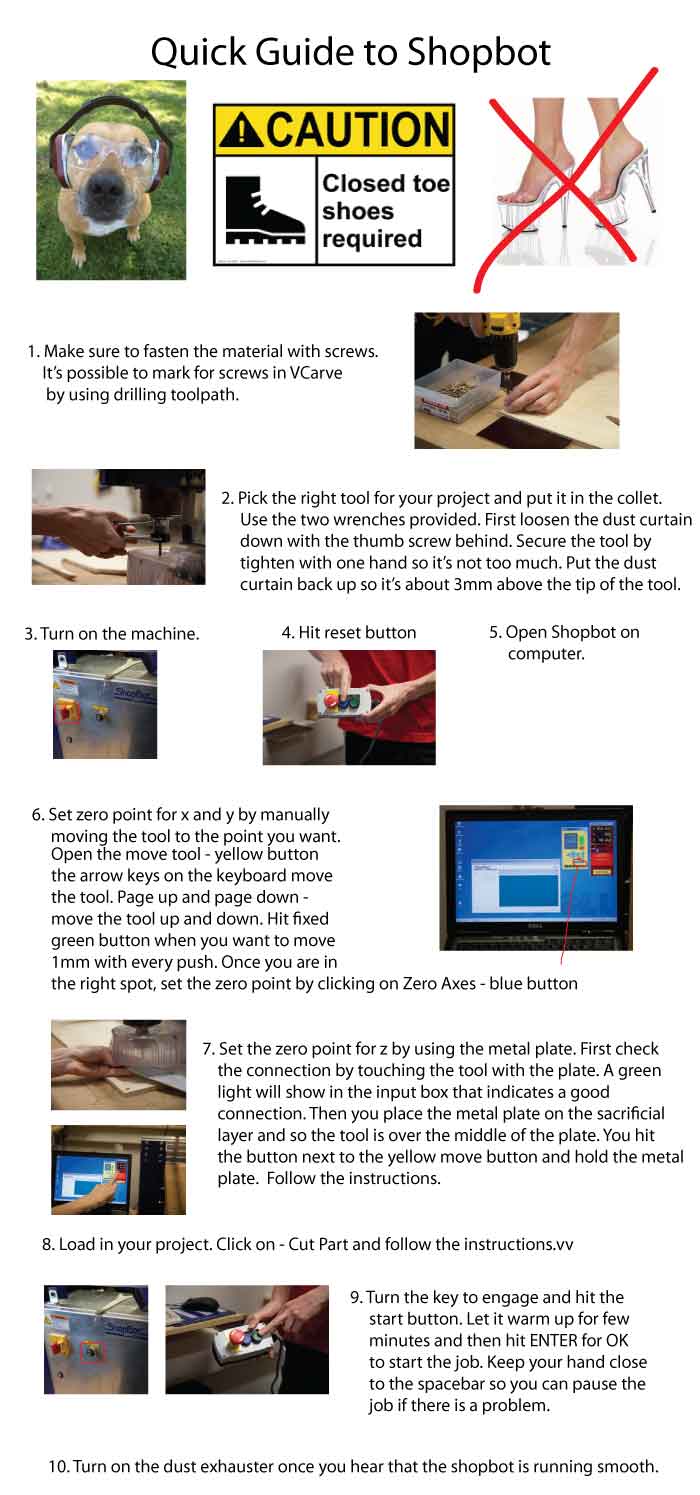
Now everything is ready for the Shopbot. I open my file in the computer in the Shopbot room. I save each toolpath into the Z drive and then I can open it in the laptop that runs the Shopbot. Bas had given us a great introduction on the Shopbot and then we also had these Icelandic instructions that were great. I made myself a shorter version - a shortlist of things I would have to remember:
Now I can begin :)
18th of March - Notes
Computer-Controlled Machining
machines
Roland
ShopBot our focus this week
Hurco
Harrison
Omax
EDM
MTM
stock
rigid foam insulation (gesso, heat gun) molds and tooling
veneer plywood
medium density fiberboard (MDF)
medium density overlay (MDO)
oriented strand board (OSB)
HDPE
Lexan, polycarbonate
Garolite
aluminum
vendors
McMaster-Carr
Home Depot
Admiral Metals
Boulter Plywood
Steritt Lumber
Beacon Sales
job shops
Proto Labs
Firstcut
Cycle Start
DHS
tooling
drill bits vs end mills
flutes
coatings ceramic coating
center-cutting
up/down cut down cut is cleaner but up cut is better for chip clearing
flat/ball end
speeds and feeds
chip load: ~ 0.001-0.010" = feed rate (inches per minute) / (RPM x number of flutes) how much material is moved
cut depth: ~ tool diameter size of the tool
step-over: ~ tool diameter/2 half of the size of the tool
lubricants
abrasive machining
fixturing
vises
clamps
screws
vacuum
tabs
weights
adhesives
tape
encapsulation
squaring
dust collection
flexures, living hinges, kerfing make one joint test it and then continue - remember to chamfer
toolpaths
kerf, offset, runout dogbones
conventional, climb
2, 2.5, 3, 3+2, 5
rough/finish cuts
cut depth, clearance, collisions
t-bones
lead-in, -out
test cuts, cutting air first so I know it´s working properly and in the right place
ShopBot VCarvePro
FeatureCAM
Mastercam
HSMWorks
Omax Layout
fab modules we use
file formats
.rml
.sbp
.g
.ord
safety
training respect the instructions - sharp and hot and things can go flying. Have to wear safety glasses, good shoes(toes covered)nothing loose in your clothes and your hair has to be tied up. Never ever reach into the powered tool. Make sure you know how to stop the machine before you start.
cuts, burns, impacts, fires
glasses, shoes, clothes, hair
don't reach into a powered tool
emergency stop, assistance
welding
arc
MIG (metal inert gas)
TIG (tungsten inert gas)
spot
friction
ultrasonic